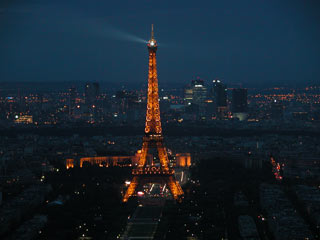
Paris Eiffel Tower at night from Montparnasse Tower
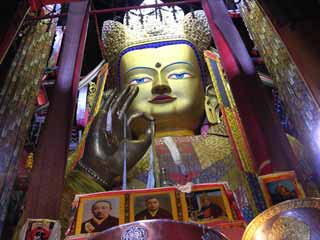
Tashilhunpo monastery in Shigatse, Tibet has this huge 26.2m image of Maitreya, the Future Buddha
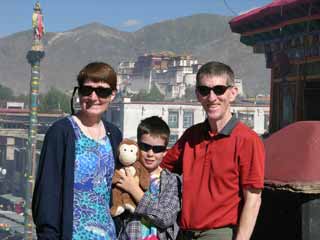
Charlotte Ryan, Dangles, Peter Ryan, and Jerome Ryan on the roof of the Jokhang Temple in Lhasa, with the Potala Palace behind

Kailash North Face shone at sunset
|
I've read that a camera is nothing but a box that lets light in, and that the
real key to great travel photos is the person behind the camera - you!. I
totally agree. I've seem photos from people with expensive equipment that are,
well, not that good. Hopefully, you'll agree that my photos are pretty good,
even though my equipment has been fairly basic, kind of high-end consumer. For leisure travel it can be ok to bring lots of cameras and lenses, but for
trekking and light-weight travel, size, weight and convenience are critical.
My current equipment
- 10mp Nikon D80 digital SLR body
- Nikon 18-200 lens - I wanted one lens to do everything
- Kenko Pro 300 DG 2x Teleconverter - for extra close up shots in good light
- Hoya 72mm Pro1 Digital Polarizing Filter and Hoya UV Filter
Here are my recommendations for taking great photos:
1. Take plenty of photos
- I once saw a slide show by a professional photographer. He showed four
or five extraordinary photos of Antarctica. He asked the audience to guess
how many photos he took to get those best ones. Nobody even cam near the
real answer: 4,000!
- I follow that photographer's advice and take lots of photos, especially
in different lights or different angles and zooms. Digital cameras make this
especially easy, as I review all my day's photos each evening. I delete most
of the duplicates and keep the best.
- The vast majority of people I see taking photos take them from
eye-level. Try lots of different positions. One moment I'm lying on the
ground and the next I'm climbing a rock a or hill.
2. Use The Best light
- Sunrise and sunset have the best light of the entire day, so try and get up
before sunrise!
- Before you go, analyze where you are compared to the mountain and the
sun, so you know when to take the best photos. If the mountain is between
you and the morning sun, it will lack detail, but will silhouette nicely.
That same mountain will look fantastic, glowing in shades of red and yellow,
at sunset.
- Lousy Weather - cloudy, foggy, raining or snowing? Come on, it's
adventure! For many photos, especially people, flowers and plants, and
waterfalls, the ideal weather is a bright cloudy day. I've ruined what
looked like would be great photos of local people when they are squinting
into the sun or have deep shadows on their faces. If the sun peaks through
the weather, the photos are usually magical.
- Twilight just after sunset is great for photographing the lights of a
city, with the sky still somewhat blue.
3. Use your flash
- Everybody knows to use a flash indoors. But outdoors you should too,
- When you have people in the foreground of a photo, you should always use
your flash. It will reduce the sometimes harsh shadows.
4. Improvise for a tripod
- I never carry a tripod when I trek or travel. It's just too much weight
and inconvenience.
- When I need to get a steady shot, I look around for a ready-made tripod,
like a rock. I often use things in my pack or pockets, such as
batteries or even the pack itself.
5. Study the Weather
- Study the weather patterns. Quite often, mountains are cloud-free in the
early morning and cloud over in the afternoon.
- Ask permission, with a friendly smile, before taking photos of local
people
- Always use flash when taking close up photos outdoors. The sunlight can
be harsh and cause shadows
My equipment over the years
- To get the old 35mm negatives for this site, I use an Epson 4180 negative film scanner.
- In 2007 I jumped back to a digital SLR, the Nikon D80, with a great Nikon 18-200 lens
- In 2004 I bought the Nikon 8700.
- In 2003 I switched to digital and back to a pocket camera, the Nikon 5700.
- In 2002 I switched to a Canon EOS3 body and added a Sigma 17-28 wide-angle,
Canon 28-135mm, and the 1380g Canon 100-400mm telephoto zoom lenses. This extra
weight nearly killed me on my trek to Annapurna
- In January 2000 I switched to film SLR, the Canon Elan II with basic 28-80mm and 70-300 lenses.
- For my trips and treks up to 1999, I used simple pocket film cameras, like a Pentax 40-160mm.
|
